LVT Floor Installation
Water-resistant LVT installations with meticulous subfloor preparation.
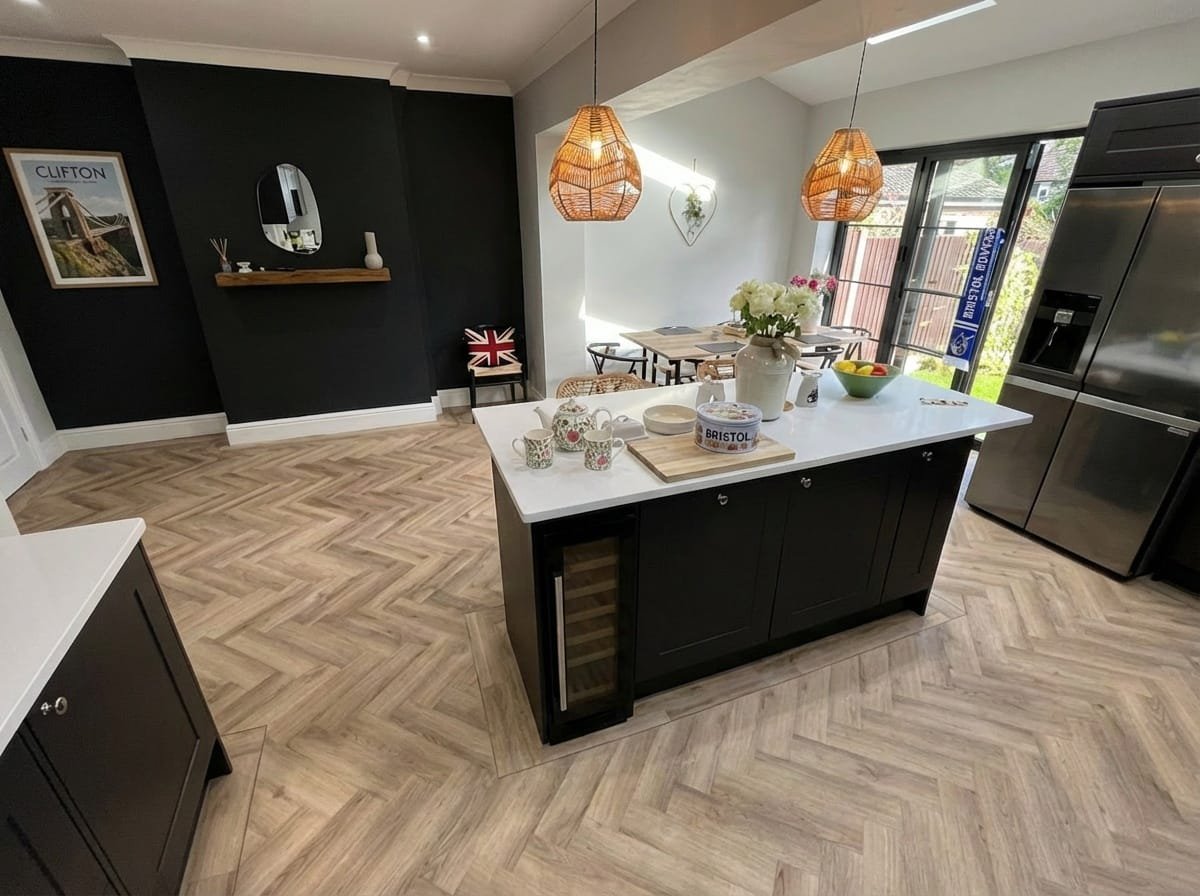
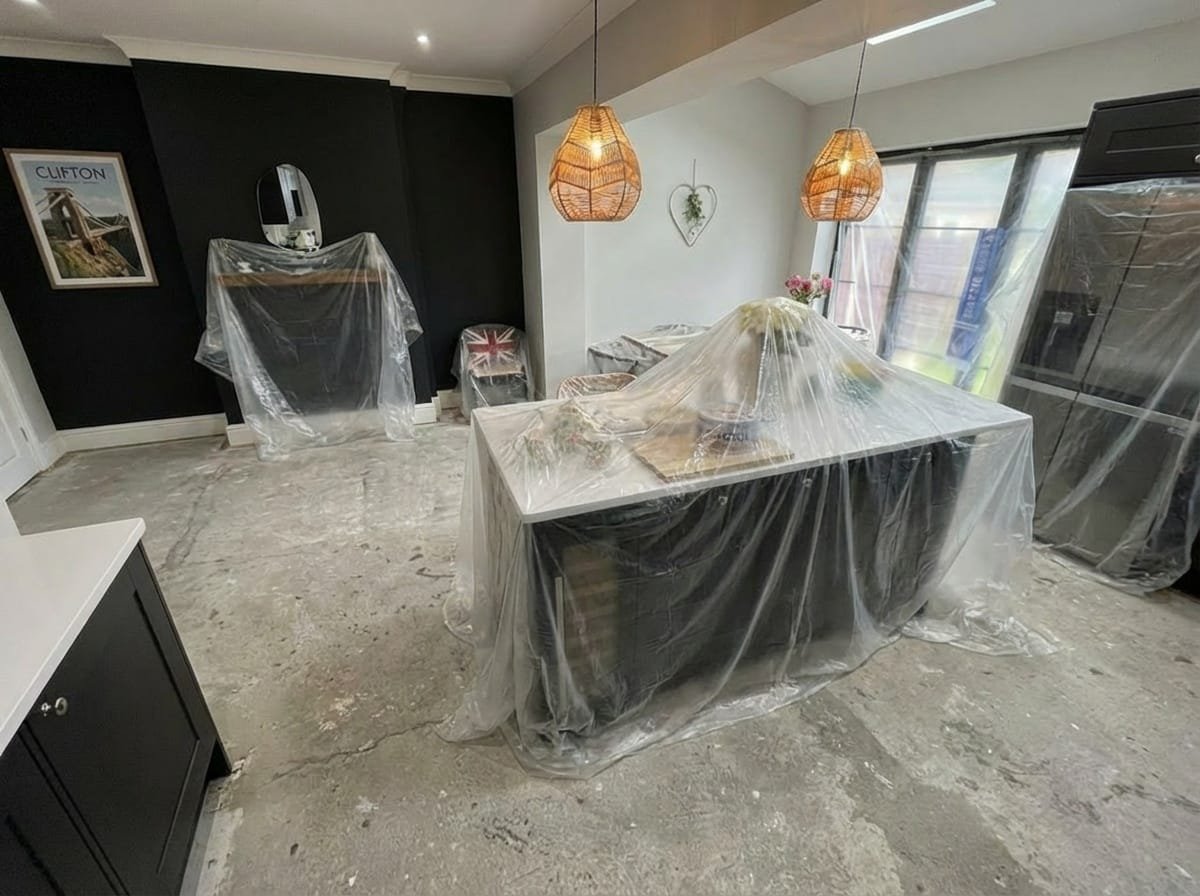
Drag the handle to compare before and after.
Preparation & planning
On-site survey
Detailed measurements and layout planning ensure every board lands exactly where it should.
Plan confirmation
Board direction, layout details, and installation sequence are finalised with you before fitting starts.
Subfloor readiness
Levelling, damp-proofing, and acoustic underlays matched to your floor specification.
Installation detail
Method matched to your floor
Nail, glue, or clip systems recommended for each room and material.
Precision finishing
Door casings undercut, trims hand-scribed, and thresholds aligned for a seamless finish.
Client handover
Protective coverings, cleaning guidance, and aftercare plans delivered before we leave site.
LVT Floor Installation process
- Step 1
Initial consultation, design guidance, and quotation.
- Step 2
Finalise plans with customer and prepare the subfloor and area for installation.
- Step 3
Precise installation with continuous quality checks.
- Step 4
Finishing touches, clean-down, and personalised care advice.
Frequently asked questions
How important is subfloor preparation for LVT?
Critical. LVT shows imperfections, so we level and smooth the subfloor before fitting.
Can LVT be fitted in bathrooms or kitchens?
Yes. LVT is water-resistant and works well in wet areas when installed correctly.
Do you use click or glue-down LVT?
We recommend the system that best suits the room, traffic levels, and subfloor condition.